Monarch Homes | The House Next Door | Exterior - Before
The house the day we bought it!

Monarch Homes | The House Next Door | Exterior - After
We replaced a lot of the landscaping - and what we didn’t replace we trimmed up. A new garage door, house numbers, and light fixtures updated the whole look of the house. However, the biggest exterior changes were a new driveway, and new front porch columns and a front door.

Monarch Homes | The House Next Door | Exterior - Before
The original front porch and front door.

Monarch Homes | The House Next Door | Exterior - After
Updated front porch and front door!

Monarch Homes | The House Next Door | Landscaping - Before
The house had been vacant for months before we bought it and the landscaping was so overgrown. 75% of what you see in this picture was poison ivy and Mike and I are both allergic. We joke that every summer until the end of time we’ll get poison ivy.

Monarch Homes | The House Next Door | Landscaping - After
We ripped out all of the overgrown landscaping and seeded it. We also removed the white fence and replaced it with a double gate chain link fence so the backyard was not only fully fenced, but also accessible by a riding lawn mower.

Monarch Homes | The House Next Door | Backyard - Before
We ripped out all of the overgrown landscaping that was hiding the fence, replaced the garage service door, updated the patio, and removed two windows from the house to accommodate the new kitchen location.

Monarch Homes | The House Next Door | Backyard - After
Looking at these pictures has given me nightmare flashbacks to ripping out all of that overgrown landscaping!

Monarch Homes | The House Next Door | Patio - Before
This screened-in patio was very obviously in dire need of a facelift!

Monarch Homes | The House Next Door | Patio - After
We replaced the screened-in patio with big, pretty white columns and a beadboard ceiling.

Monarch Homes | The House Next Door | Living Room - Before
We demolished the entire wall on the right of this picture to open up the living room.

Monarch Homes | The House Next Door | Living Room - After
This is the new view when you walk in the front door.

Monarch Homes | The House Next Door | Living Room - Before
The living room before.

Monarch Homes | The House Next Door | Living Room - After
We removed the dividing wall between the living and dining rooms and replaced it with two much smaller walls to divide the spaces.

Monarch Homes | The House Next Door | Dining Room - Before
This wall separating the living room and dining room was the very first thing we demolished when we bought the house.

Monarch Homes | The House Next Door | Dining Room - After
We removed the wall, but did add small walls to either side to break up the two rooms just a bit.

Monarch Homes | The House Next Door | Dining Room - Before
We opened up the doorway to the dining room and the staircase to the basement. It was one of my favorite updates we did!

Monarch Homes | The House Next Door | Dining Room - After
The open staircase made the spaces feel more connected and larger. It also made the floorplan flow better.

Monarch Homes | The House Next Door | Kitchen - Before
This galley kitchen was tiny so we moved it to what was the family room at the time. Instead, this space became a laundry room and half bathroom.

Monarch Homes | The House Next Door | Laundry Room - After
We didn’t move the windows so they’re good reference points. This window is the right window in the before picture.

Monarch Homes | The House Next Door | Kitchen - Before
Another shot of the kitchen when we bought the house.

Monarch Homes | The House Next Door | Half Bathroom - After
We added a half bathroom where some of the kitchen was. The window above the toilet used to be above the kitchen sink.

Monarch Homes | The House Next Door | Kitchen - Before
Looking into the family room - which became the new kitchen. We created a hallway where the cabinets are on the left side of this picture.

Hallway - After
Monarch Homes | The House Next Door | The new hallway looking into the new kitchen.

Monarch Homes | The House Next Door | Living Room - Before
This is the family room that would eventually become the new kitchen.

Monarch Homes | The House Next Door | Kitchen - After
The new, much larger, kitchen!

Monarch Homes | The House Next Door | Living Room - Before
This room was an addition years ago so one of the ceiling beams was actually structural. We removed the others because I felt they made the room feel heavy.

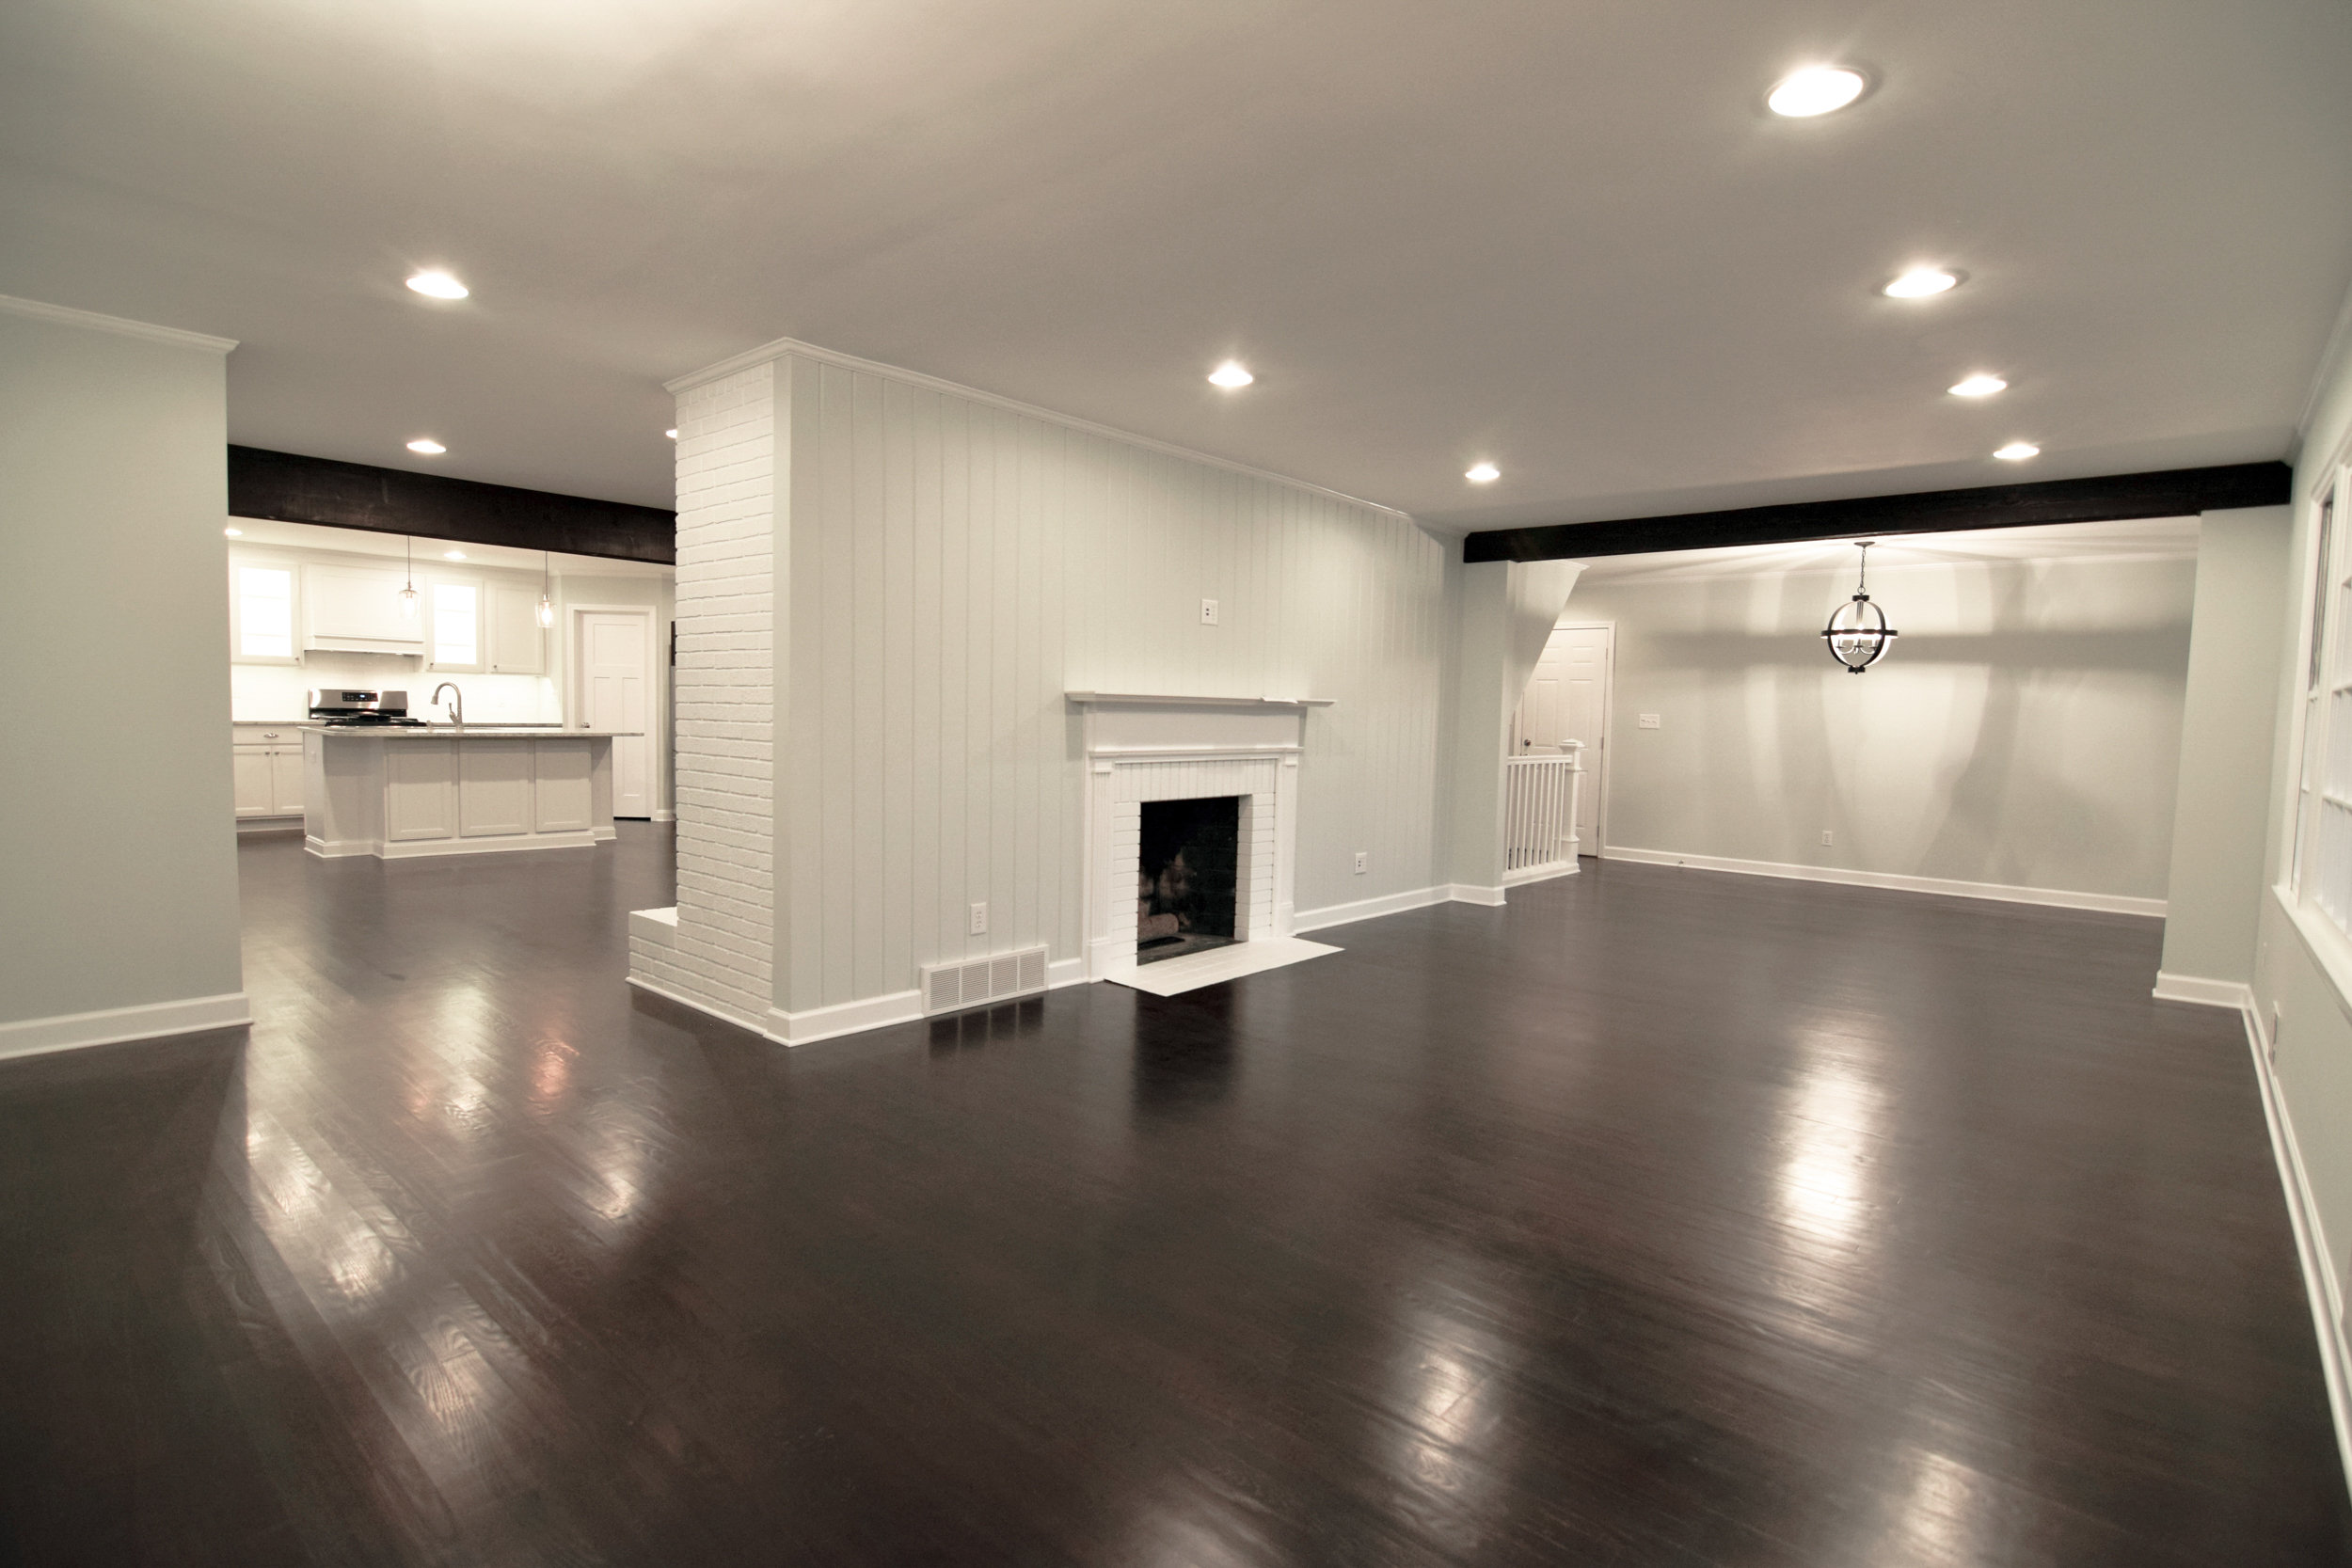
Monarch Homes | The House Next Door | Kitchen and Living Room -
Painting the huge fireplace white brightened up the space a ton.

Monarch Homes | The House Next Door | Living Room - After
To make room for the new kitchen, we had to move the windows on the far wall.

Monarch Homes | The House Next Door | Kitchen and Living Room -
You can see in this picture that the windows have been moved a few feet and are now closer together.

Monarch Homes | The House Next Door | Guest Bathroom - Before
This bathroom was huge and the master bathroom (which shared a wall with this bathroom) was itty bitty. We decided to take the two bathrooms and demo the walls between them and then split the area in half, giving us two equally sized large bathrooms.

Monarch Homes | The House Next Door | Guest Bathroom - After
The vanity in the new guest bathroom went in the same place where the original vanity was, but everything else in the bathroom moved locations.

Monarch Homes | The House Next Door | Guest Bathroom - Before
I had never seen a bathtub like this and after some research I found out it’s called a Princess or Cinderella Bathtub. We tried to sell it and got a few offers, but it was so heavy and large no one could haul it. We ended up demolishing it, which turned into a project itself!

Monarch Homes | The House Next Door | Guest Bathroom - After
We installed a new bathtub on the wall opposite of the vanity, which used to be part of the master bathroom!

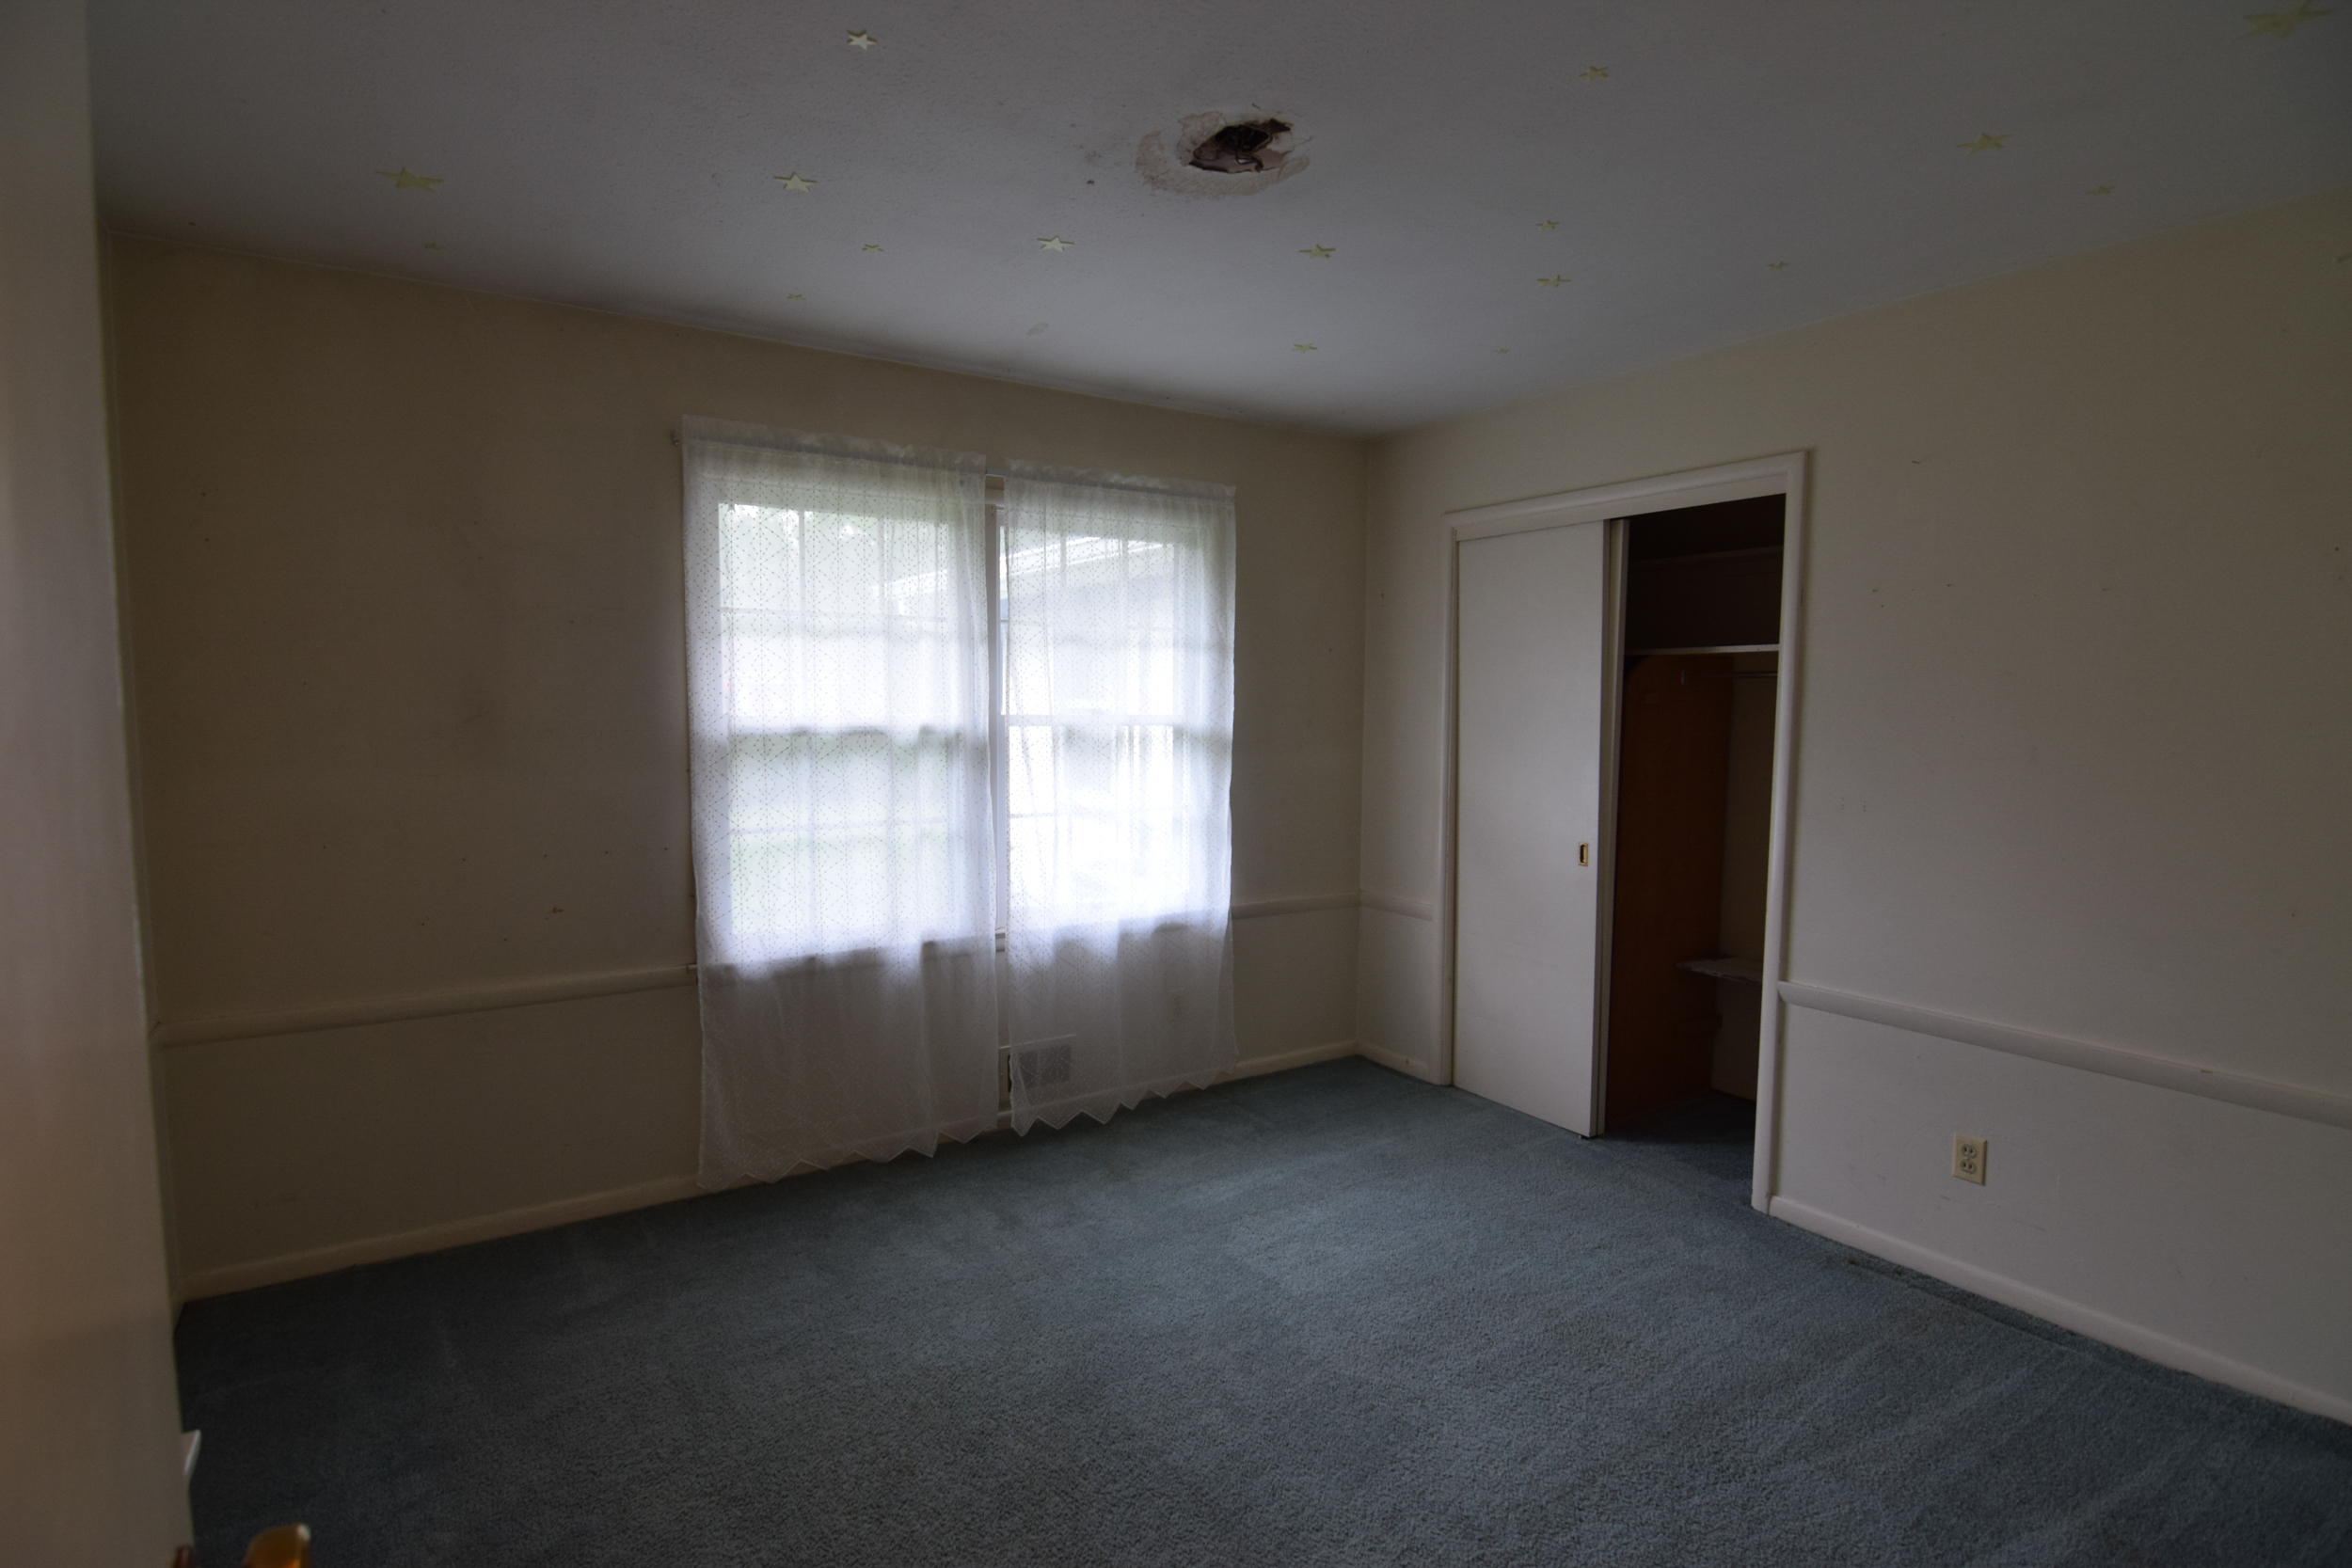
Monarch Homes | The House Next Door | Guest Bedroom - Before
This bedroom had what looked to be some sort of an electrical fire at the light fixture. It also had bright blue carpet that was hiding beautiful hardwood floors!

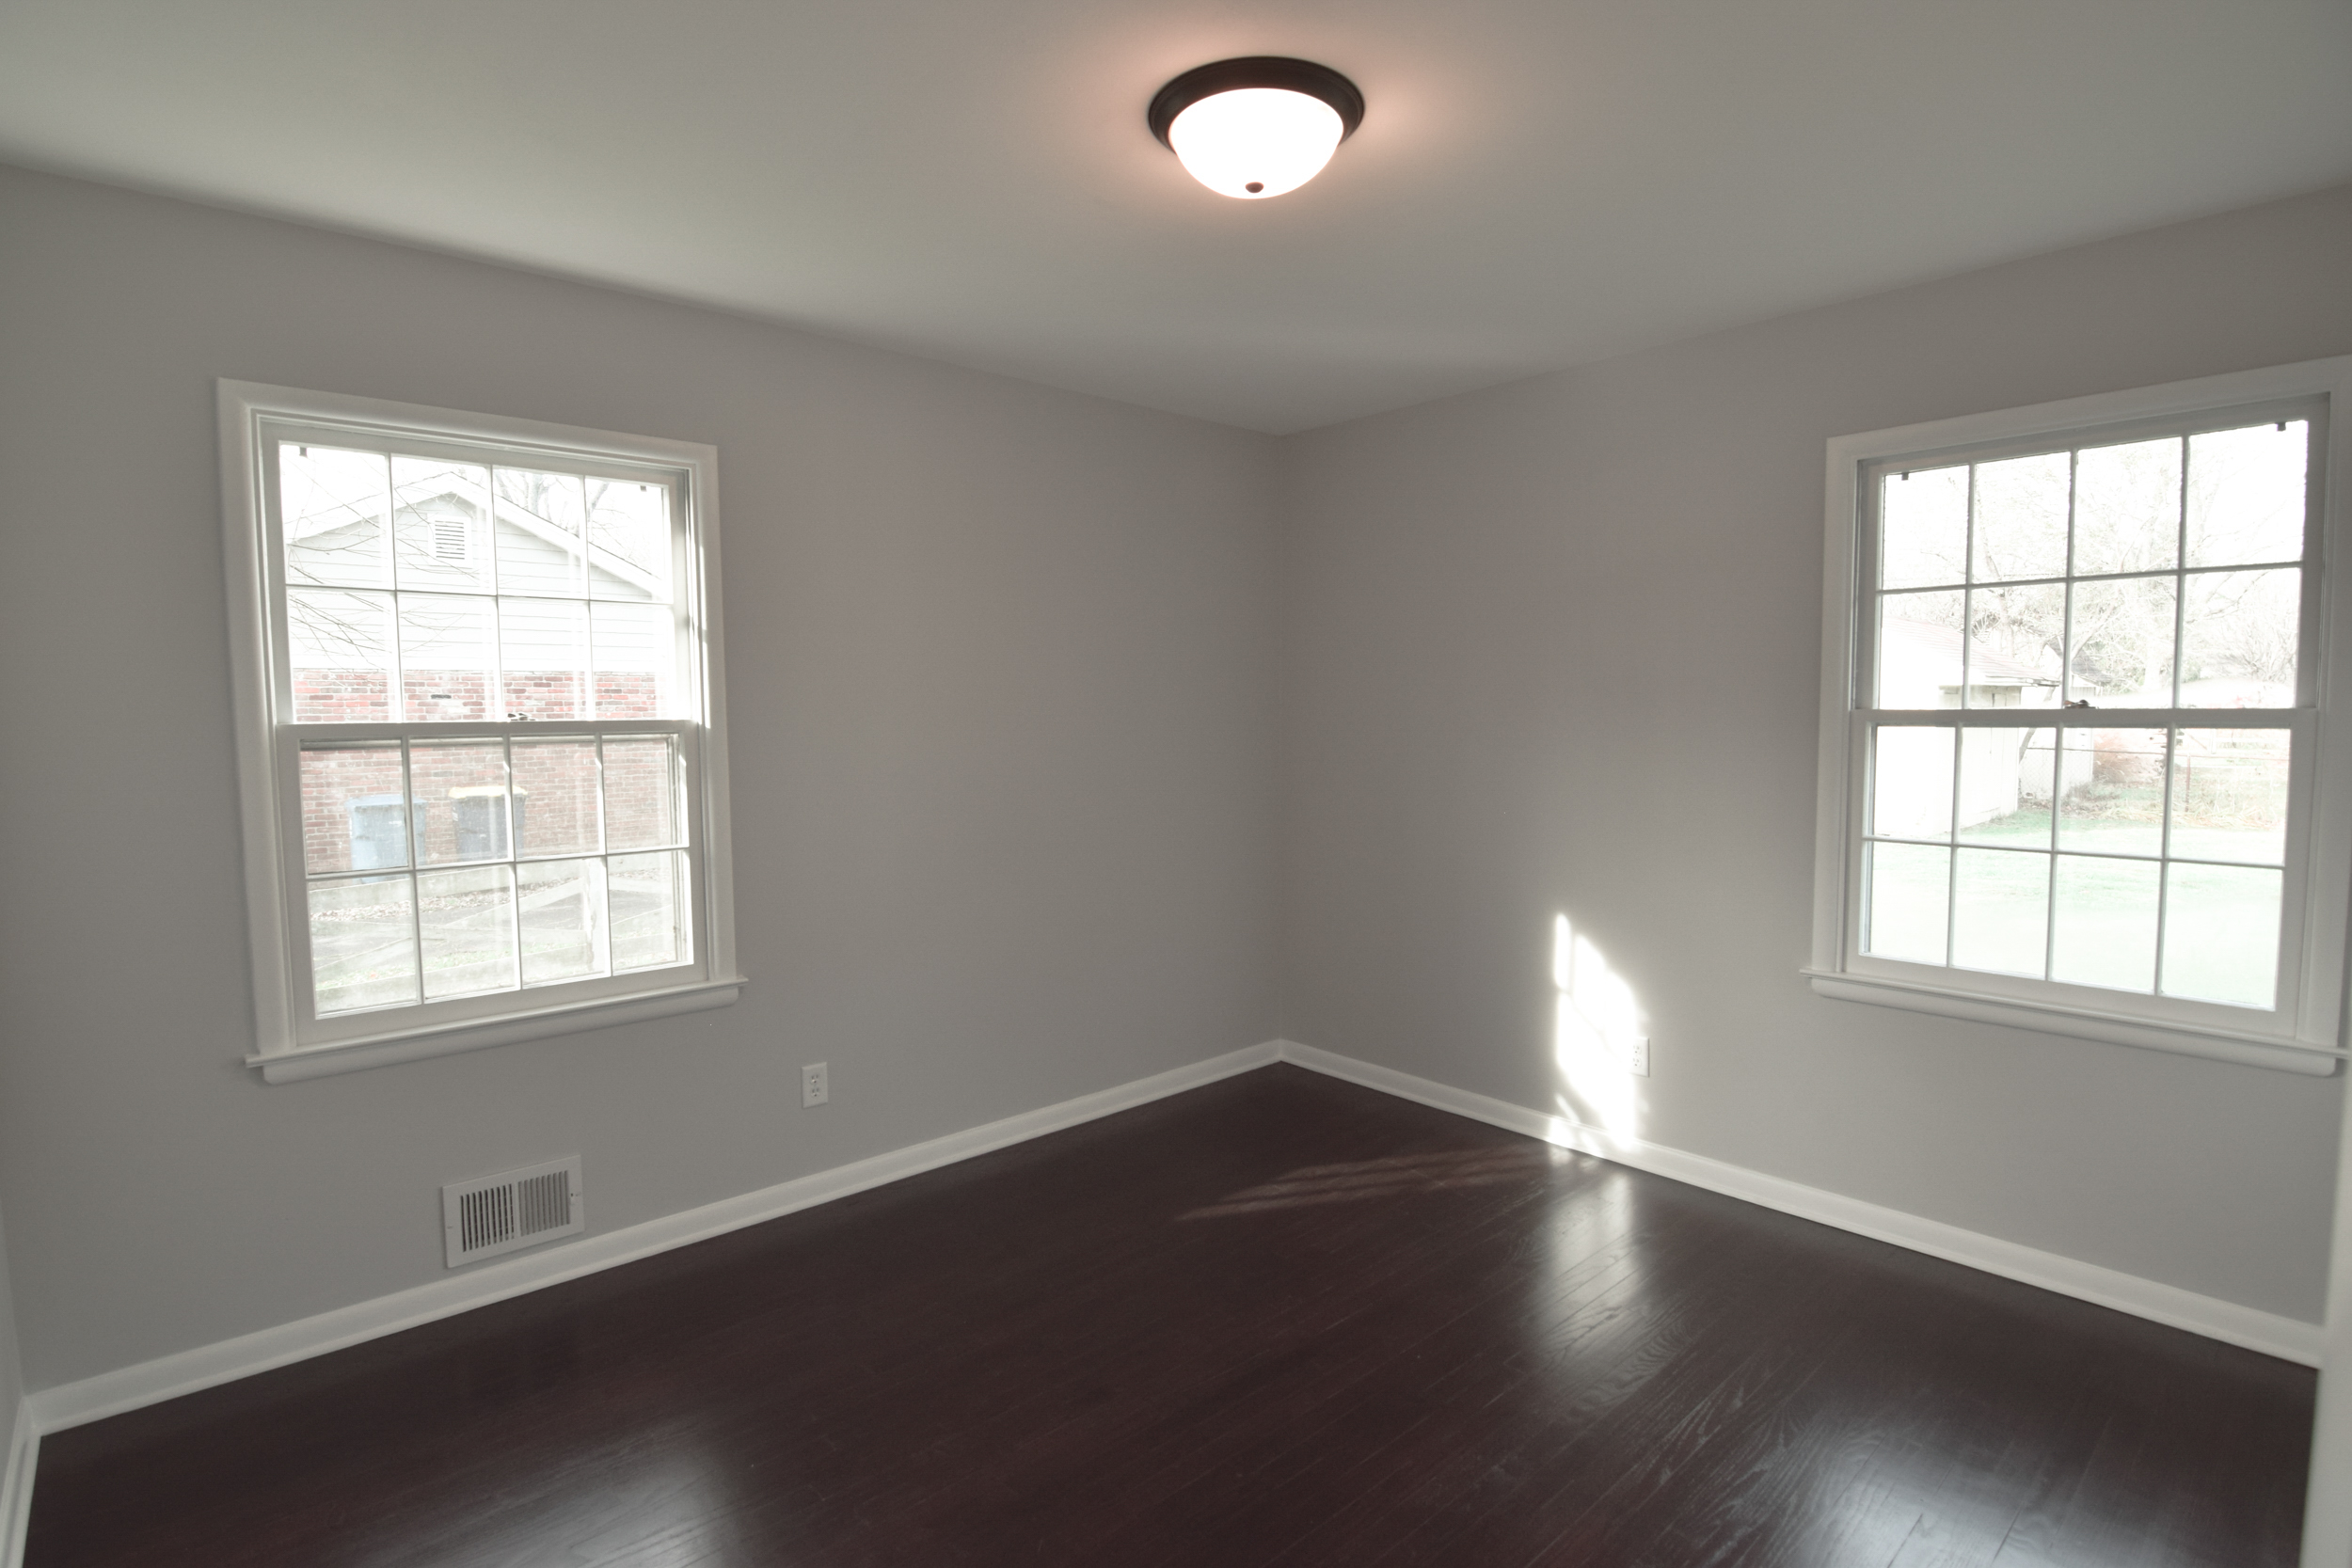
Monarch Homes | The House Next Door | Guest Bedroom - After
I actually liked the chair rail in this room so we kept it. A fresh coat of paint, a new light fixture (and wiring!), and refinished hardwood floors totally transformed this room.

Monarch Homes | The House Next Door | Bedroom - Before
We probably did the least amount of work in this room. It was all cosmetic updates.

Monarch Homes | The House Next Door | Bedroom - After
Paint, refinished hardwood floors, and a light fixture was all this bedroom needed.

Monarch Homes | The House Next Door | Master Bathroom - Before
So much blue! This is the itty bitty original master bathroom. I couldn’t even get a picture of the shower because the room was too small for me to get a wide enough angle on it!

Monarch Homes | The House Next Door | Master Bathroom - After
Master bathroom after we split the old guest bathroom and the old master bathroom and got a much larger space to work with!

Monarch Homes | The House Next Door | Master Bedroom - Before
Master Bedroom Before

Monarch Homes | The House Next Door | Master Bedroom - After
The master bedroom got a full cosmetic facelift - refinished hardwood floors, paint, doors, vent and outlet covers, light fixture, etc.!

Monarch Homes | The House Next Door | Basement Stairs - Before
The original basement stairs

Monarch Homes | The House Next Door | Basement Stairs - After
We opened up the stairs to the basement and it made all the difference!

Monarch Homes | The House Next Door | Hallway - Before
The before of the back hallway which led to the guest bathroom and all three bedrooms.

Monarch Homes | The House Next Door | Hallway - After
The back hallway after!

Monarch Homes | The House Next Door | Basement - Before
We did a complete remodel of this side of the basement. Windows, ceiling, lights, floor - all the things!

Monarch Homes | The House Next Door | Basement - After
We designed this space to have the potential of a home theater. The cabinet on the right was built for electronic components and we ran HDMI behind the back wall so if you mounted a screen your cords would be hidden.

Monarch Homes | The House Next Door | Basement - Before
The pipe on the right is the water shut off and unfortunately couldn’t be moved. To accommodate, we built a closet around it. You can never have enough storage anyways, right?! It also added some symmetry to the room since the opposite wall had a bump out as well.

Monarch Homes | The House Next Door | Basement - After
The recessed lights were split into three separate zones to give flexibility for whatever entertaining would be done in the space - movies, ping pong table, poker table, etc!

Monarch Homes | The House Next Door | Basement - Before
We liked the look of the open staircase - even before the basement was finished - so we knew we wanted to keep a similar look for the finished product!

Monarch Homes | The House Next Door | Basement - After
We felt like keeping the bottom of the stairs open made the room feel bigger and more open - plus it would make moving furniture into the room a heck of a lot easier too!

Monarch Homes | The House Next Door | Garage - Before
While garages are never really pretty we did clean this one up quite a bit. It actually had a “cattery” in it when we bought it. There was a big handmade structure in the garage for cats to live in and it even vented outside through the service door. Can’t say we kept that.

Monarch Homes | The House Next Door | Garage - After
For some reason the garage didn’t have an opener when we bought the house so that was one of the first things we installed. We also did a ton of patchwork and then gave it a fresh coat of paint — after we removed the cattery! We also installed a new garage door and repurposed the kitchen cabinets.


